This test compares the two cameras in regards to recording a color image containing red H-alpha common in emissions nebulas. The XM camera used the CFW/8 filter with Custom Scientific RGB filters. No light pollution filter was used so as not to skew the
filter characteristics of the two cameras. A 2" Baader UV/IR filter was used with the XCM to avoid the effects from NIR emissions . The red filter used with the XM is IR blocked so the Baader filter was not used.
Below are the spectrum curves of the Bayer color sensor and the mono sensor w/Custom Scientific filters. Aside from the loss in QE of the color sensor, which can be compensated for with longer exposures, the RGB crossovers are different especially the important blue and green intersection points. This accounts for the XCM image to often have a more blue hue to it when first processed.
One major advantage with a mono sensor is there are more options for using different filters such as narrow band imaging or different RGB spectral curves. The Bayer filters are fixed in their
characteristics so additional processing will be needed to correct color shifts depending on the type of object being images. Hydrogen-alpha is the only narrow band imaging you can do with the XCM with adequate results.
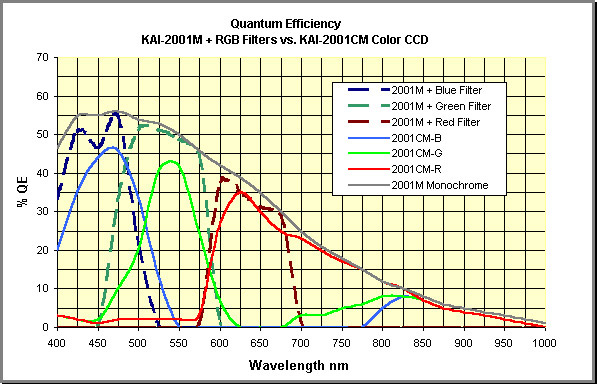
Image courtesy of Santa Barbara Instrument Group
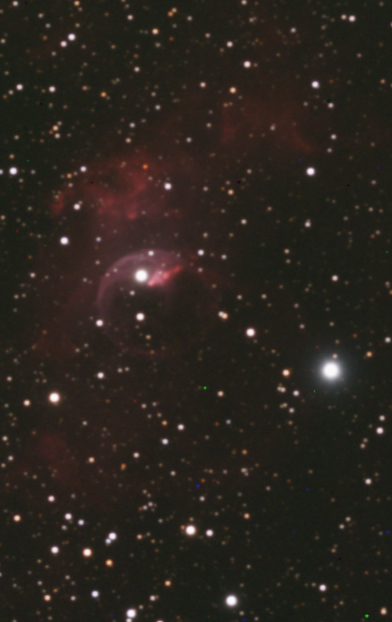
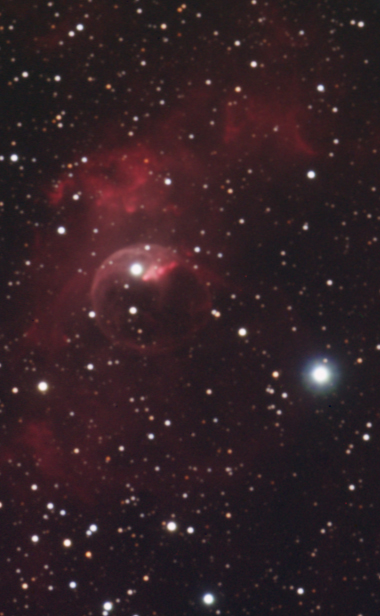
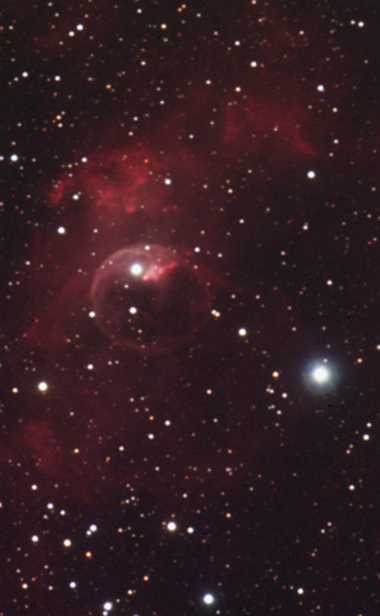
Below are the full resolution cropped centers of the Bubble Nebula. Using Images Plus, only calibration and equal DDP stretch levels were applied with no attempt to clean up noise or hot and cold pixels.
Exposure times are 170 minutes total for the XCM and 60 minutes for each of the RGB filters of the XM totaling to 180 minutes.
Going back to the color camera saves time argument, the time require for equivalent exposures with good S/N are almost the same.
A G2 star weight was applied to the XM R,G,B layer set during color channel combine.
Shown are the differences between the XM and XCM images.
• The S/N looks the very close in both examples.
• The XM version is more brighter due to the higher QE of the mono CCD and has slightly tighter stars.
• The XM displays a defined star halo around the brighter star. This can be a common occurrence with mono cameras using filters.
• The XCM displays more of a green background.
• The XCM smaller stars have red color artifacts around the edges caused by the de-bayering process.
• The XCM doesn't display a defined star halo around the brighter star which is more aesthetically pleasing.
|
|
|
Full scale center crop of the Bubble Nebula taken with the XCM camera.
|
Full scale center crop of the Bubble Nebula taken with the XM camera.
|
ST2000-XCM color data details:
- Date - 10/13/2007 12:30AM
- Temp - 46F 8C
- Humidity - 66%
- Dew - 36F 2C
- Visibility - 10 miles 16.1Km
- Wind - 5 mph 10 Km/h
- Exposure - 17 X 10 minutes Bin 1x1
- Sigma Average Combine
- CCD Temp -25C
- OTA - TMB130SS APO
- 2" Baader UV/IR filter
- Image scale 1.68 arc seconds/pixel
|
ST2000-XM color data details:
- Date - 10/14/2007 1:45AM
- Temp - 50F 10C
- Humidity - 64%
- Dew - 38F 3C
- Visibility - 10 miles 16.1 Km
- Wind - 1 mph 2 Km/h
- Exposure - (R)6X10 (G) 6X10 (B) 6X10 minutes Bin 1x1
- Sigma Average Combine
- CCD Temp -25C
- OTA - TMB130SS APO
- Image scale 1.68 arc seconds/pixel
|
Post Processing Comparisons
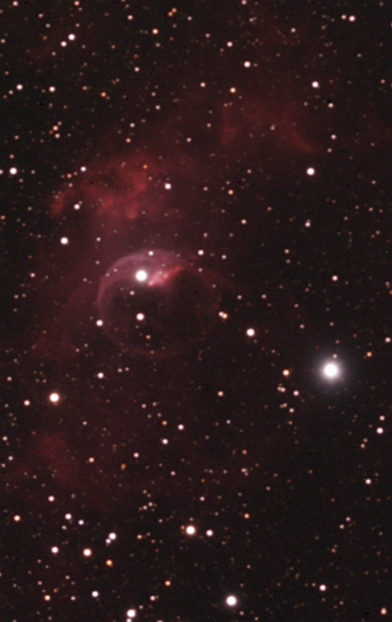
Below are the same 2 images equally done with one pass of Adobe CS unsharp mask with a 1.6 pixel @35% setting.
• The XCM example required an additional layer to balance the background and reduce the green cast. A curve layer was used to boost
the overall brightness to approximate that of the XM version. Another layer was used to select the stars and apply Adobe's selective color to reduce the red star edges. This doesn't remove it but make it less noticeable because the curve layer made them pronounced.
• The XM example still shows slightly finer details in portions of the outer nebula structure but not by much.
|
|
|
Center crop of the XCM Bubble Nebula after NR,
sharpening and star artifact reduction.
|
Center crop of the XM Bubble Nebula after NR and sharpening.
|
Star Edge Color Artifacts
Below are star examples magnified 300X. The XCM camera shows color fringing artifacts around the edges as a result of the de-bayering process when there's usually a rapid change in color.
This can lead to inaccurate colors distributed within the stars pixels if they are small and also give a slightly jagged edge appearance as well. The artifacts can be made less visible through processing as shown below and are more often not seen when the image
is down sized for web display.
The XM camera shows much tighter stars and doesn't display these artifacts. It's important to keep the focus between the R,G and B filters of the XM in tune otherwise the PSF will vary and possibly produce bloating similar to these artifacts.
Using a star mask and a selective color layer in Photoshop the artifacts around the edges can be less noticeable by reducing the color saturation as shown below. It's best to do this earlier in the post processing steps. This way if the edges become more blurred depending on the techniques, it will blend in with results similar to the XM star versions.

|

|
|
XCM stars zoomed to 300X showing edge color artifacts
|
XM stars zoomed to 300X showing more natural edge colors
|

|
|
XCM stars after reducing saturation on the edges.
|


